So Your Set Failed – Now What?

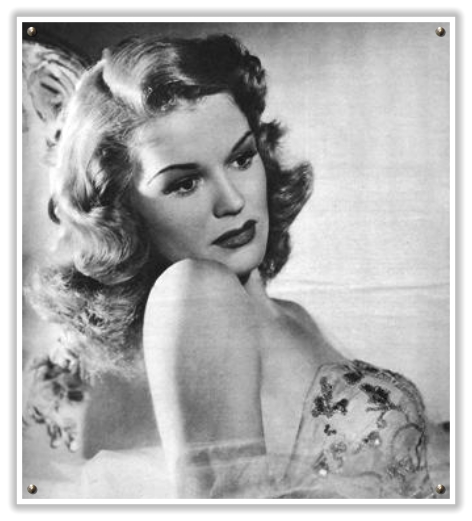
You spent at least half an hour last night meticulously setting your hair. You made sure the curls were even and you used setting lotion. You let it dry all night. But then you woke up this morning and looked like this.

Holy mother of god.

No matter how much you brush, you still have hair like the crazy cat lady from The Simpsons. Or maybe half of it is curly and the other half is straight except for one wave that sticks straight out. What do you do? Well that depends on just how your set failed, but luckily there are many options and I’m here to save the day. Because I have experience.

1. Everything worked except one or two curls.

Dampen the failed pieces and put them back into pin curls (Even if you don’t normally do pin curls, just use a mascara wand to roll around if you find it difficult) and leave it to dry for an hour or two before taking them back out. Alternatively you can use a very small barrel curling iron or hot sticks.

2. You’re dealing with a weird half and half situation.

IMG_0130

Instead of pretending you’re some two-for-one creature out of Greek mythology, use hot rollers on all of your hair to even things out. They shouldn’t be hot enough that they pull apart the curls that worked, but they will curl up the looser side to match.

3. It curled just fine, but nothing is going in the right direction.

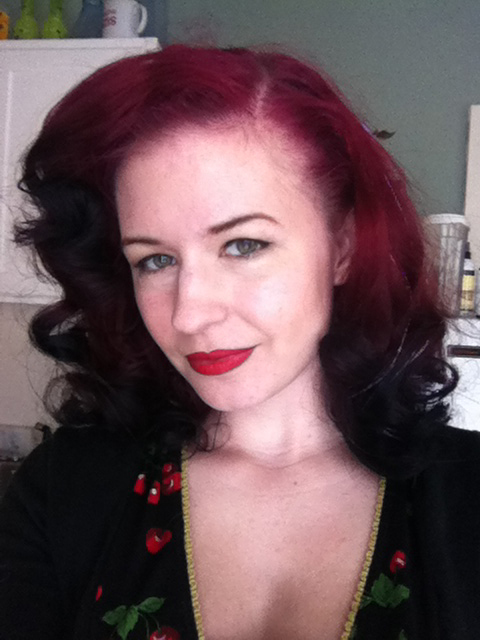
You wanted a page boy and ended up with a flip. Or something equally not to your taste. This is the time to use the curls to your advantage in creating a rolled updo. Start off with two or three victory rolls, then keep rolling the back into rosettes. Glamorous! See also: #6.

4. Nothing is curled, it just looks like a very interesting case of wavy bed head up in here.

IMG_1852

Take a flat iron and just concentrate on smoothing out the wonky bits, holding it at an angle to encourage a bit of curl instead of making it straight. I’ve woken up looking like a crazy person and in just a couple minutes of flat iron adjustments I ended up with something quite luxurious, if in a totally modern way. Until the wind got it. Fuck. See also: #5.

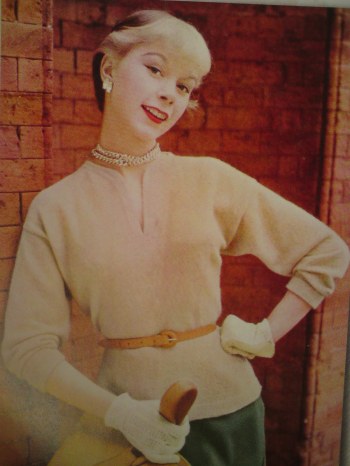
5. OMG it’s a bad afro.

IMG_1792

If you misjudged the size of your curls and ended up looking like an electrocuted chick from the 70s, smooth what you can with mouse and try out a variation of a Greek or Edwardian style. One of the easiest things you can do is a looser version of the gibson roll – take a narrow circular headband placed OVER your hair, and tuck the ends up, over, and into it at the base. This is a beautiful and sophisticated look that can even be done on the bus without a mirror, as I have had to do. I also like the Goody Modern Updo pin for the world’s easiest messy chignons. Basically what it all comes down to is to throw it up in a messy romantic sort of way, however you choose to do that.

6. You have curls, but they’re just a little blah

IMG_1862

Or they’re uneven. Or you feel like getting a pretend hair cut and going all out Great Gatsby style. This is almost the same as the style mentioned above, but slightly reversed. Put the headband (or scarf, if you’re fabulous), under your hair at the nape like you normally would, and again tuck the ends into it. Nobody will know you’re hiding below-shoulder length hair in that old-timey bob.

7. It’s hopeless. Hopeless I tell you!!

What the living hell is this!!

What the living hell is this!!

IMG_1472

Same camera. Also same me. I shit you not.

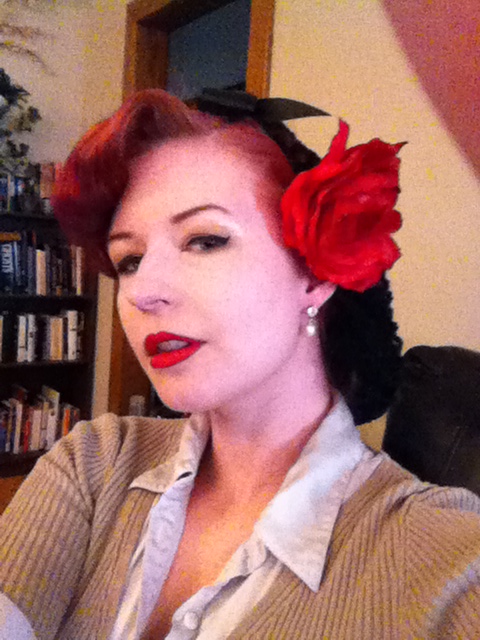
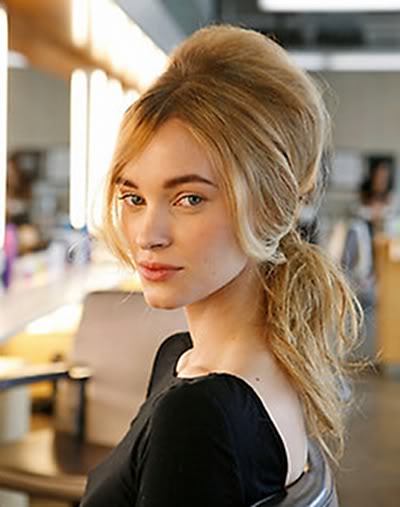
For when nothing else will do, or you’re just not in the mood for any of the suggestions above, or it’s windy, or rainy, or any number of situations. When you think “I’m screwed,” use a snood! It’s easy, it’s fool-proof, and you will look just like the awesome kind of vintage fashionista you were trying to look like when you set your hair in the first place. They come in a ton of different styles and colors to suit your mood too, so it’s a good idea to have a little collection of them. You can do victory rolls or a pomp in the front, add a flower, and presto!

Pp1lK

Option 2 – The beehive! Separate the front of your hair from ear to ear. With the back portion do either a french twist or a ponytail at the crown. Backcomb the shit out of it until the very sight of yourself makes you laugh your ass off. Smooth it out VERY gently, pinning down loose ends. Lightly backcomb the back of the front piece you left out and gently sweep back to cover the poof ball. If you don’t have enough hair to make your poof ball as big as you want it, use some fake hair stuffed into a hair net as a rat to fill it out. Tuck in the ends and pin. Super easy, super cute. And it can last 2-3 days!

8. Fuck it.

meghantruck-edit

There are actually curlers under this bandanna

Alternatively if it’s a casual day, make a pomp or roll in the front, throw the rest up, and stick it in a bandanna. This is a great idea for days when you can’t look that fancy, like when you’re painting, gardening, or roller-coaster-ing. This is also perfect if you would prefer to just re-set it and start all over again, because it will cover it up. It is after all what you do at night. I know you don’t go to bed lookin’ like no grandma.

Here’s lookin’ at you, kid!

The Life-Cycle of a Pin Curl Set

Have you ever really wondered why you should learn how to do pin curls? With all the effort it takes, it better be worth it. It takes so long to master and if you’re new to doing it it can take an hour to set each time! GAH! I myself often think about doing a pin curl set and end up saying “fuck it, ain’t nobody got time fo dat.” But on those occasions that I do push forward and do it, I’m really glad I did. Let me chronicle here for you how a pin curl set looks – and holds up – so you can see and compare for yourself. I typically set it dry and spray to wet with Lottabody setting lotion diluted in water once it’s done. As for a setting pattern, I barely have one. I just roll it all down and under, except sometimes at the base I roll it up just because it’s easier that way. I don’t use hairspray so it’s not a factor in these photos. Keep in mind that my hair is naturally super straight, fine, and will only hold a curl after serious negotiation.

April 2nd – I started last night with kind of dirty day-5 hair, but I had done pin curls Friday night for Viva and thus had the motivation to do it again, even if I figured I’d have to wash it soon and might not get the full life out of it. Instead of using the large end of the pin curler I used the small end for the first time. I guess I just wanted to see what it would do. While the pinned curls look the same as when I use the larger end, the result is really quite different. Here’s the large end, that I used over the weekend…

CurlsLarge

And here’s what I woke up with today

IMG_1540

So cute! I wish I had tried this weeks ago!

8 hours later it was definitely fuzzier, but had not fallen at all.  So for starters, let’s have a look at what happens when you just sleep on it as-is with no preservation, since this isn’t going to last much longer before I have to wash it anyway.

The next morning…

IMG_1559

Looks like a fresh pillow roller set!

Not bad.  By tonight it once again has managed to hold, however it’s clearly getting pretty gross so that’s the end of that. Now let’s start again and see how long it lasts when I preserve it overnight.

Day 1…

You can see how pleased I am by my expression

You can see how pleased I am by my expression

I think the small end of the pin curler actually works better when my hair is a bit dirty. It was all fluff. By the end of the day it was a little fuzzier like before, but basically the same. So by now we have learned that pin curls, though they may fall somewhat at night without preservation, don’t fall easily throughout the day.

Day 2…

Hooray, it's cute!

Hooray, it’s cute!

Last night I made maybe about 10 large pin curls using a foundation stick as a tool, and left them dry. So now we get to compare the difference this makes. As you can see I also did a victory roll, because pin curls make them about a million times easier so why not.

Day 3…

Last night I fell asleep on the couch and woke up at 4am, so I did a pretty half-assed job of preserving the set. I did 4 very large, very messy pin curls around the base of my head that were just barely hanging on in the pins, left the victory roll alone, covered it in a bandanna as usual and stumbled into bed. Nevertheless, it still looks great this morning.

IMG_1629

Can you believe this is day three? At this point I almost feel like I could keep this up indefinitely until my hair gets dirty. Have I cracked the code on how the girls at Viva could look so gorgeous all day every day on so little sleep? Of course the catch is that I figured it out a few days AFTER Viva. Oh well.

Day 4…

IMG_1651

While it miraculously doesn’t seem to be falling any noticeable amount, I am noticing a change in shape, though I’m not sure if it’s because the curls are getting old or because my hair is getting dirty. It’s a mystery for the ages. My hair is starting to deflate slightly, though it still looks good. It’s been losing its fluff and getting smoother, which is nice to a point. And it’s starting to form ringlets, which is annoying.

Day 5…

Yes I'm in my pajamas.

Yes I’m in my pajamas.

I’m still going at day 5. Basically my hair looks the same as it did yesterday, but by now I would really like to wash it. I wonder if I should give in and do it, or hold on another two days to really see how far I can take this thing. Also notable is it’s not trying to make ringlets anymore. I thought that was part of the curl aging process but it seems to have just been a slightly bad-ish hair day. I’m pretty much back to normal shape-wise.

Day 6…

IMG_1687

Ok so I have some pretty good volume here all things considered. My curls are becoming waves, but still have shape. I’m pretty happy! I think I’ll hang in there for the last day.

Day 7…

IMG_1736 IMG_1743

Yeah, so today became a ponytail day.

Yeah, so today became a ponytail day. And I added pearls!

Happy Day of Pink, bitches! I’m wearing pink right down to my mismatched socks, except all blue underwear because I’m a rebel like that. I think these pictures might do a little too much justice to my hair right now. I feel like until this point, you couldn’t really tell that it wasn’t first day hair, that I hadn’t styled it just like that on purpose. Today it’s obvious that this is an old set. It may be because I lightly sprayed it with diluted baking soda in preparation for my next wash, or it might be that I put all the curls on the top of my head overnight because I was sick of pins poking into my head as I slept, or it might just be that it’s been a damn week since I washed my hair. Either way, I’m glad I’ll be starting over tonight. And I’m pretty impressed that it’s lasted this long. I asked Mike if I should just put it in a snood because it was “wonky and loose” and he said “that’s the way I like you,” so I guess I’ll take that as some sort of compliment. And I have no one to impress but myself anyway. Today is a day against discrimination, and that includes discrimination against my dirty fallen hair. That’s right. I timed this thing perfectly.

So what do you think? Broken down over a week, I don’t think I spent much more time on this than on a regular roller set, and I’m pretty inexperienced with this so I’m slow. With a roller set, I have to set it from scratch with water every night, and within a few hours of taking it down I have loose shapeless ringlets that look pretty lame in comparison.

And this is how it looks fresh!

So, worth it? I think so!

Now all this is well and good, but what happens if your set fails? Check back on the 25th, when I’ll show you no less than 8 options, none of which include the ponytail.

Snoods

When I woke up on Christmas Eve I had a failed set. It hadn’t happened in a while, but there it was, a couple floppy wet curls, and only a few of them really worked the way I wanted them to. The perfect dampness for curls really is a science. Normally this would mean putting it into an only slightly less stupid looking ponytail, and maybe having to change my whole outfit because wonky ponytails rarely look right with cute vintage-y clothes. Well the convenience fairy seems to have paid me a visit because I had just gotten my new snood in the mail. Bad hair day: fixed.

Snood from Arthelia’s Attic

A snood, for those of you just entering the world of vintage style, has a long history. To be brief, they started in the renaissance. They were really pretty and had pearls on them and stuff. Then they came back in the civil war, and after Gone With The Wind became super popular, they became a staple of working women during WWII.

I wonder why I never got one before. I knew about them obviously. But they just never grabbed my attention. They had seemed a little utilitarian and costume-y I guess. But eventually I figured I would get one anyway. For variety’s sake.

As soon as I tried it though, it occurred to me that a snood is more than a fashion statement, it’s a life-saver. Failed set? Fixed. Windy out? No problem. No time? Fixed. Feeling lazy? No problem. It takes two minutes to make your hair look cute and you don’t have to do jack else to it. Curls fill it out better, but to be honest I wouldn’t be above just back-combing it a little and shoving it in there. If you’re good at doing rolls all the better. I do mine with a foundation stick – another life saver because victory rolls are hard. Add a flower and red lipstick – you look perfect. Nobody needs to know you just rolled out of bed with shitty looking hair.

Snood from Arthelia’s Attic

The ones I got were from Arthelia’s Attic. These are the “expensive” ones. They’re the best, made from the right kind of yarn for the right drape, from a vintage pattern, and with a cute removable bow. Even so they’re only $25. Not actually expensive at all. Mike has been calling them my “dudes” for some reason. They come in all different colors (I got black first because it goes with everything) and don’t slip at all. It’s hard to look at a snood without imagining it just slipping right off but I wore mine for over 12 hours and it didn’t budge. I only used two pins. And really, it doesn’t have to look costume-y, though that’s still cute if you want it to. I wore a pretty regular shirt and pencil skirt, nothing really 40s, and it worked out great. So it really seems to depend on the clothes and other accessories you wear with it. So versatility too! Yay!

IMG_0959

I had to get a pink one too. You can get yours here.

Updates!

The Beehive – Easy Updo Version

Remember my first beehive tutorial? It wasn’t bad, pretty easy. But I found something even easier, that is if you want an updo version. This thing is totally idiot-proof. First separate the front of your hair from ear to ear. With the rest of it make a high ponytail where you want the beehive to sit. 90% of the time this will be at the crown. Then backcomb the living shit out of that ponytail. It helps to do it in small sections. Make a big scary mess of it. Then very gently smooth it out and pin, just enough so you have no big weird lumps or hanging bits. Lightly backcomb the back of the section you separated just enough for it not to separate, and gently cover your poof ball and pin, and tuck in the ends. You are done. This takes under 10 minutes and can easily last 2-3 days straight, even with very minimal hairspray. I mean you can literally sleep on it and wake up with your hair still done. The above picture is the second day of my second time doing it, and I had just cleaned up the front a bit.
Root Touch-Up

You know what Root Touch-Up is? It’s a fraction of the dye for the same price as a regular box, but you get a shitty little brush and tiny plastic container. Skip it. Wait until you see a 2-for-1 deal and get two (or four) boxes of totally regular dye. I like Garnier and Superior Preference. Then you get a tint brush for 2$ and line a bowl with saran wrap. Pour a little of each bottle from a box into the bowl – I don’t know the exact ratio so I just aim for 50-50 and it seems to work – just what you’re going to use, and leave the rest in the bottles. Dye with developer like this expires within the hour if you mix it, but if you only mix what you need then you can keep the rest until next time. You can get 2-3 uses out of a full box this way. It makes doing your roots a lot cheaper, and you’ll usually already have some dye around so it’ll also be less of a chore. Hell, I don’t even use gloves.

Blending Bangs

If you’re growing out bangs, or you just prefer them a bit on the longer side, it can be tricky knowing how to deal with them so they look nice and don’t hang in your eyes. I’ve personally found that tip-of-the-nose length is the most versatile as far as style, however you MUST do something or they’re annoying as hell. You can curl them softly with a little flat iron for casual side bangs (below, very gently curled. You can also curl them more of course), use standing pin curls away from your part to blend them in when you’re curling the rest of your hair, or use some pomade or gel and brush them to the side when your hair is straight. You might need a pin for this. You can also do a little pomp. My favorite thing to do lately is to curl them forward either with pin curls or a flat/curling iron, put some pomade through it, an aim them away from the face with the ends forming a little circle at the side. It’s super pretty, and I don’t end up awkwardly shoving a pin in it halfway through my day to get it out of the damn way. It also looks fine when the rest of my hair is straight and lets me feel more properly “done.” It’s wonderful.

The Middy – By Holly Hui
I got my hair cut again by Holly Hui and this just shows why I love her and recommend her so much. Like my fire ombre?

Goth Rosary

Ok enough about hair for the moment. I just received my latest package from Goth Rosary, and I’m still nuts about them. I got Seattle Rain, Tea & Sympathy, and my fourth bottle of the always amazing Samhain. Her things smell like the things they smell like. They’re unique and don’t smell like alcohol. Tea & Sympathy is exactly what she describes – flowers, tea, and cookies. Yum. Seattle rain is fresh and clean and like an ocean storm. Come on, if you still haven’t tried this stuff you absolutely must.

Hiding Corsets

I also recently discovered Lucy’s Corsetry on Youtube. Now this is someone I can look up to. This girl is a scientist who’s been tightlacing for years, so she has not only reviews on every corset maker in town, but tons of reliable and fascinating medical information, repair tutorials, corset making tutorials, and outfits of the day. Now that my waist is about 21 inches virtually every day, getting dressed has become somewhat difficult. Nothing really fits, and when my waist shows it looks damn weird. Lucy suggests empire waisted tops, and when I tried my only empire waisted dress I wondered why I was such a moron I hadn’t tried it before. But now I’m going to need a whole lot more of these. Very wide belts are also great if you want to show a little but not everything. The wider they are the less they can fit into that tiny corner you’ve created between your ribs and hips. According to my mom this still looks freaky, but she should see what I would look like with a smaller one. So it’s still an improvement. I had also been avoiding wearing girdles over my corset to smooth over the bottom ridge and lumpiness from the lace because I figured it would just be WAY too much discomfort and effort for your average work day. Well I wore one to go out clubbing one night and it was so not a big deal I pretty much forgot I was wearing it, so don’t shy away from this one. Comment below with tips of your own!

What else to wear with your corset?

I just had a thought, and came in here to add a new update. I have a vintage black pencil skirt from the 50s, and when I put it on today over my corset I was amazed at how perfectly well it fit. No bagginess around the waist, even though I can wear it without a corset, though it’s snug if I do. My mom was surprised and asked me how I managed to get my skirt to lie so smoothly when hers always bunch up oddly when she wears her corset, and I just told her it was vintage so it was cut differently. But then I got to thinking more about that. This skirt is probably from the early to mid-50s, when the New Look was all the rage, that silhouette created by Dior of tiny waists and full hips. It was around this time that women were commonly wearing waist cinchers to accommodate the fashion, so my skirt was likely cut for a woman who would wear one, and that’s why it fits so amazingly well over a corset. So if you’re not necessarily trying to hide your corseted shape, but just want your clothes to fit already(!), I would definitely suggest buying vintage from the late 40s to early 60s. I’ve gotten my few vintage pieces from etsy, and there are a ton of other online shops out there if you find the local thrift shop way too corrupted by the 80s.

Oh wow, I really haven’t been posting much about fashion lately have I? Ok, here you go. This is the best shirt ever.

Pin Curls for Dummies

Pin curls are incredibly difficult to master. We all know this. I’ve been struggling off and on for ages trying to figure it out, and I was determined that as soon as I could manage a successful set, I would write about it here to help all of you who know what I’ve been going through. Don’t give up, it’s so worth it. There’s nothing like a pin curl set to get the most authentic look, the most malleable and cooperative hair, and the most staying power out of your look.

The basics. A pin curl should be wound (or wrapped, more accurately) from tip to root, not the other way around. This way the end gets tucked in and doesn’t stick out all funny. It’s especially important not to twist it or you’ll get the fuzziest incurable afro instead of smooth vintage curls. The basic technique is to take about a one inch section of hair, wrap the end a few times around a finger or two, and then slip it off your finger and wrap up to the scalp and pin with a pin curl clip or a couple bobby pins in an X. I recommend 2 fingers because it’s easier to get the hair off, and you can put the very tip of your hair between the two fingers to pull it into the center where it belongs. This is all fairly straight forward, but it’s extremely challenging to keep that little circle neat and tight as you wrap it, and to keep the ends in, especially if your hair is naturally straight.

What helps – the first thing you can try, which is time consuming but makes a big difference, is pin curl your hair when it’s already curled. If you’re dedicated and have a lot of time, you can set it in hot rollers before setting it in pin curls. But this gets to be a bit much, definitely not something you want to do on a nightly basis. The other way is to do a regular roller set one day, and then set it in pin curls that night. It doesn’t help much for keeping the curls tidy as you wrap them, but it really does help to keep the ends in and get the curls started, since you’re working with a shape that’s already somewhat what you want. Another quick tip – I found that standing pincurls are a little easier to position on your head, easier to clip since there’s less hair to get around, especially if your hair is long like mine, and gives more volume. They’re too small to really crush while you sleep, and if they do at all then the hair at the top will cover it. I managed this with no issues at all. Only one curl got crushed, and once it was all brushed out you couldn’t tell if you tried.

The BIG thing that helped me, I feel the only reason I was able to accomplish this finally, was using a pin curler, or pin curl stick. These are generally uncommon. When I googled it, I found nothing. The only mention I found of them was on the fedora lounge, where girls routinely do pin curl sets and look at old magazines of the vintage era. My grandma had never even heard of one and she’s been doing pin curls for probably over 60 years. Where I first heard about them though was in a Lisa Freemont Street video about pin curling. She had the Sculpture Pincurler from Vintagehair.com, and because she’s never steered me wrong, I got it immediately. The packaging and the product itself are authentic 1950s, totally adorable. It has a different size on each end, honestly not much different, and the ends are comb-like. So you put the tip of your hair through the comb part, roll it up like a curler, turn it on end, and slip your hair off. Brilliant. This made everything VERY easy, and the top and sides of my hair at least turned out perfectly parted and even because you can only use a very specific amount of hair for each curl. It forces you to be uniform, and when everything was pinned up it looked downright professional. Amazing. But I also got to thinking, this is so simple there must be other things you can use. Such as chopsticks, or dolly pins. Or you could use little end papers and something like a marker or lip gloss tube. The possibilities are endless. Do whatever works, it’s totally not cheating.

All set.

All set.

I also just want to mention water really quick before I move on. You can spray it before, or after you set. Which one you do will depend on your hair type, how quickly it dries, and the final look you want, but unlike rollers which you only want damp enough to resemble a fine morning dew, you can sometimes get away with setting it wet. I found that spraying each piece damp/wet before I rolled it resulted in fluffy hair like in the mirror shot I took below with the flower. That next night I set it dry in all standing pin curls and sprayed it after it was all done. Quicker, and it used less water and setting lotion that way. I also found that it resulted in a much smoother curl, like this black and white picture just below here. I didn’t love it when I first brushed it, it looked a little helmet-y. But after a little time to relax and shake it out before brushing it again, it was smooth and loose and luxurious, just like Rita Hayworth. Perfection. I will be doing this from now on. From what I gather, this might be best for longer hair.

So you all must know as well everything I knew about brushing them out – on paper anyway. But there’s something really different about doing this which really makes you deeply appreciate how true it is that brushing your hair out is the most important part. To start, it’s really tough to get the brush through. The curls are just so tight. I mean my hair is 14 inches long (which is to the bra band) and the curls that came out of the pins were seriously about two inches. My hair looked very short. That’s how dense it gets, so brushing is difficult. Then you start to get a big frizzy fro.

I just had to come back to this article and add this picture, to show you that THIS is actually normal. Don't manic. Worst case scenario, brushing doesn't calm it down and you put it in a snood for the day. Put it back up into larger pin curls at night, leave them dry, and the next morning it will be beautiful.

Sorry to interrupt, but I just had to come back to this article and add this picture, to show you that THIS is actually normal. Don’t panic. Worst case scenario, brushing doesn’t calm it down and you put it in a snood for the day. Put it back up into larger pin curls over night, leave them dry, and the next morning it will be beautiful.

See?

See? Ok, I’ll let you get back to the tutorial now.

It gets scary. And you know you have to keep brushing for ages, but it’s not THAT long. Maybe a good 5 minutes. Try not to freak out during that 5 minutes. I knew this would happen and yet I almost did. But as you go, you start to see your hair turn into a shape. The top of your hair WILL smooth out, you won’t get granny hair unless it’s really short, like the midi baby or something. Brush against your hand of course, and brush it in the direction you want it to curl. To get everything uniform, and turn it into pretty much one solid mass of hair, I pulled everything back into a ponytail and brushed around and under my thumb, then made sure the ends were tucked in and gently spread it around to the sides. When my hair started to break up and look a bit messy I just did it again. Just a few seconds to get everything back into place. Now just add a flower and you have yourself some real 40s glam going on.

My first successful pin curl set. Go me!

So this takes a lot of time, many failed attempts at about an hour or so each time. But you’ll get there. It will get better, and faster. Just know that no effort is wasted. I found that even when my hair came out wonky straight, pin curling gave it enough structure to make the ensuing hot roller set last over 12 hours in high humidity. Hot rollers or hot sticks are blessings for a failed set, and everybody gets them. And then when nothing else will do, you simply have a new opportunity to try a cute retro updo. Keep at it!

Here’s that great video from Lisa Freemont Street.

Bang Thing

First of all I really have to thank Micheline Pitt for this one. She posted the video that taught me this. It wasn’t my idea, I’m just sharing it with you.

I always thought clip-in bangs were expensive. I remember seeing them only for about 50$, and I definitely wasn’t going to pay that, so I never got any, as cool as I thought they would be. Then Micheline posted a hair video. I was shocked to learn that her bangs weren’t real, and even more shocked to learn that at least one pair came from Sally’s for a mere 7$. She was using one more expensive kind for long side swept bangs, and the Bang Thing from Sally’s for bettie bangs, which she cut herself. I did a complete double take, and ran off to the website to buy two of them immediately. I was not disappointed.

The Bang Thing looks hilarious when you first put it on. Actually it looks really stupid. But for 7$ you’re not mad, you just laugh at the hilarity of it. But it really just takes a minute to get it looking good. Clip all your own hair neatly out of the way, clip in the bang thing, and style it by putting one small piece on the thin side of the part to keep it looking natural, and ease the rest into place to the side, out of your eyes. Simple, and very cute. Micheline uses a scarf as a headband to hide the top edge of it. You can use that, or a bandana, or a headband, or anything else equally obvious. I know she doesn’t use this brand for the long bangs, but I find they work really well. They’re a tad bulky for sure, but I just tucked some of the top hair under my bandana and it helped, as well as to hide some of my natural hair in the front, since it was important as my hair is really faded right now and doesn’t quite match.

“Did you tell her about your little hat there? You know, your little hair hat there.”

Things got only slightly trickier when it came to cutting the second Bang Thing into bettie bangs. Micheline is experienced at cutting hair, but recommends having a stylist do it for others. Of course I was way too impatient. Making that first cut was a touch terrifying. Almost like cutting your real hair. You instantly wonder if you’re being an idiot and going to need to buy a new one. But I figured it out and it was quite the success. Here’s what you do.

And for my next clever disguise…

First cut the bulk of the bang thing just enough to indicate the approximate length you want. This should be at about eyebrow level or so. If you’re nervous at all, go a little longer, just enough so you can see. Then get the thing off, because you don’t want to risk cutting your own hair anymore. I was already starting to make this mistake, it’s easier than you think. Now, one important thing to keep in mind is that bettie bangs are actually round. I would have had an impossible time getting the shape right while it was still attached to my head, so I got the idea to use a bowl as a stencil. Yeah, I gave my fake hair a bowl cut. Get a decent sized cereal bowl and press it firmly over the bang thing, right up to the edge of where you cut. Make sure the hair is pulled taut so you’ll get it even. Then just cut all the hair that sticks out from the bowl. This makes a mess, so best to do it over a paper towel, even if you cut the paper towel in the process. Actually this even helps, because otherwise the hair just wants to creep out of the way of your scissors if they’re not especially sharp.

You. Rawr!

When you’re about done, lift it up, comb it straight out with a fine tooth comb, and inspect for any uneven pieces. Fix them carefully, still without the bang thing attached to your head. Now get a really small barrel curling iron or small flat iron and curl the very ends under. This will help give it the final shape and disguise any pieces that might not be quite perfect. You’re done!

When you put it on you can adjust the look of the length by placing it further forward or back on your head. You’ll use the same bandana or scarf or whatever to cover up the back edge. Mine looks super cute, and I totally suck at this. So there you go! Watch Micheline’s video, and add that tip about the bowl for the bettie bangs, and you’ll have some really cute bangs that you can play with for different looks without the commitment, or barely any money. Bang Thing rules!

The Perfect Eyeliner

Eyeliner isn’t easy. It takes a lot of practice to apply properly, and the brands can be hit and miss. So I’ve been meaning to write about it for a while.

I mentioned Stila eyeliner when I posted about my last trip to Sephora, but I feel the need for a quick update here…
This stuff sucks.
On my hand in the store it was great, but I learned something important. The pressure you use on your hand in-store is notably more than what you would use on your eye, which is more delicate. So while it seemed great at the time, I found that the lighter level of pressure you use on your eye is not enough to get the pigment out. I have to press harder, and this makes it almost impossible to get a steady line. It makes my lines wobbly, thick, and smudgey looking, and the fine points on the wings are impossible. The Kat von D Autograph liner, while it takes a long time to dry, only requires the most minimal – if any – pressure of the fine brush, so you can create the delicate lines you need to easily. So I threw out the Stila went back to the Kat von D autograph liner. It felt good. I know some of you will still prefer a felt tip over a brush tip, but if you haven’t decided yet this is something to consider.

Now, the technique. A lot of people just stretch their eyes out and keep the line going out past the corners. Ehhhhh not the best. If you’re just doing a basic job it’s ok, but I wouldn’t do it that way for the pinup look. Clearly when you let go of your eye it changes shape. And a nice 50s wing has a distinct upward curve that continues the shape of the lower lash line. This seems challenging, but it’s not as bad as it seems. First of all, you want to do the wing before anything else. You should start by drawing a line from the corner of your eye, continuing the upward curve of the lower lash line going towards the end of your eyebrow. If your eyes are hooded you may need to take it up a little higher so it doesn’t get lost. If you have trouble getting it even, I find it helps to actually start at the tip, or mark off how high you’re going with a very tiny dot, and make sure the dots line up on each eye before continuing. Then you can start from the dot and curve down to match the lower lash line, or do as before and follow that line up to that point. This is all very wordy and sounds a bit tricky, but it’s it’s really not bad.

Once you have that done, you can line your upper lash line, just regular. Then go back to the tip of your wing, and make a line that swoops in a downward curve and connects seamlessly with your upper lash line. The less you swoop it, i.e. the straighter your line connecting down is, the more 60s the final product will look. Fill it in, and you’re done! Then if you want to add a little more drama, you can use an angled brush to smudge some eyeshadow into your lower lashline. Black is standard, but you can actually use any color you like and have a little fun with it. I like bright teal. This is my cop-out way of mixing it up.

This video mixes up the order a bit but it’s basically the same. I just like to do the wing first so I can open my eyes to check if it’s even without smudging anything since my eyes are hooded. It takes a while to get going (I hate that) so start at 2:40 if you want to cut to the chase.

Update: I recently found this. Even better than the video!

The Beehive!

Sunday night at Drawn and Plastered Stars in Pink Hawaii, I wore my first beehive. I did it myself and had it perfected and expanded by our hairstylist for the night Holly Hui. And now I want to wear one every day! Not Marge Simpson at all, it’s a super cute look and I’m its newest fan. It’s really not all that hard either. So I’ve decided to map it out. You will require: A rat, fine-toothed comb, hairspray, and the Austin Powers soundtrack.


The first thing is just to grab all the hair on the top of your head and comb it forward so it’s out of the way. This is all about the crown. This should take about a second and a half. I’ll wait.


Now, the most important thing to create a beehive is a rat, or hair filler. I mean, you don’t NEED one, but it’s a hell of a lot harder without it, and you’re more likely to end up with a rat’s nest instead. I use a long narrow rat for bumper bangs, so I curved it into a U shape with the middle facing up for this look. You can also just use a round or ball-y shaped one. A lot of people put cotton or fake/real hair into some pantyhose or a hair net for this. Bumpits are crap btw. Put your rat on the crown of your head or slightly higher in case of sagging or just to make it all the more epic. Pin it in place. Then bit by bit, take the hair from the top of your head and tease the living shit out of it, and pin it over the rat. Do this until you look like Dolly Parton. The last bit that will cover the surface should be left smooth. Then you just need pomade and a light touch with a comb to smooth the top out, and lot of hairspray. I slept in mine and it somehow actually survived, only shrinking a little. Which was perfect as I was feeling lazy and liked it and wanted to leave it up for work. Anyway, you can leave the bottom in beachy waves like Bridgette Bardot, put it in a ponytail, or for more of a Hairspray or formal look, twist it up into a French twist and tuck the ends in.
Holy crap that was easy.

This is not me, but I do feel this fabulous.

It’s Winter, It’s Cold…What the hell am I going to wear?

Ever since it snowed for the first time this year my style has been on a downward slope. Part of the problem being that I’m not getting rides to work right now, and the bus drops me off two blocks away. First I had to give up my awesome tattoo heels, because I would kill myself in them on the ice, and the new American boots from Walmart only barely resemble the really nice Canadian ones they used to sell. Those were the shit. I can’t find anything else very practical at the moment. Now I also have to make the hard decision every morning between freezing my legs and an extremely unflattering dress pants/sweater combo. I might as well show up in sweat pants and a hoodie the way THAT makes me feel. It really makes me miss working at home, on my cozy couch under a cozy blanket. What’s a girl to do?

Really, it all comes down to layering. What can you add to warm up a dress, especially a vintage style one? Well, what did they wear in the vintage era? Winter didn’t just get invented. They wore girdles, sweaters, and stockings. Full skirts of course are great with a crinoline for looks AND warmth. Spanx are super cozy, while in the summer they just make my butt itch. Then you can always add a tank top/undershirt under whatever shirt/dress you’re wearing. And 50s sweaters are so adorable I don’t know why I don’t own one yet.

On the subject of stockings, they’re actually warmer than you would expect. They’re actually comparable to pants, believe it or not. But they’re a pain to replace every wearing or two because they run all the time. The answer? Fully Fashioned stockings, the kind with the back seam that require garters. They’re made the old fashioned way, and I hear they last for YEARS. I have to get me some of those. Soon.

Speaking of pants, don’t shun them. I avoid them because I feel dumpy in them (yeah, there’s something wrong with me), I don’t find them comfortable, and dresses are just too easy. But I have been looking into 40s and 50s style pants, high-waisted with a wide leg. The wide leg reminds me of some kickass comfy emo pants I had years ago, giant black things with chains. Clearly I am now too old for these. But I really miss how they felt. I’m hoping vintage style pants would feel similar, but the high waist is throwing me off. I’m probably going to check out the mall to see if I can find something I like, but if not, I think I’ll give the pants from Freddies of Pinewood and Heyday a try. Then of course I need some tops and sweaters to go with these pants.

Topping this all off, long coats are handy. It’s a luxury if you can find a long vintage fur coat that doesn’t reek of the early 90s. Vintage coats of all kinds on Etsy are extremely affordable, easily 35-60$. Tall boots are best for pencil skirts, and short fur-lined boots are adorable with fuller skirts. Check out this picture of my meme and her sisters in the 50s. Aren’t they cute? Keep in mind this is one of the coldest cities in the world, so if it’s warm enough for them, they’re warm enough for you, unless maybe you live at the north pole.

Finally, one of my favorite little accessories is the muff. They’re so pretty and so warm. You can get them very affordably on Etsy, and they’re even easy to make. You essentially just sew a pillow, one side the width of the muff, the other side the measurement you need around your hands and arms. Then sew the ends together to form a tube. You can make these in so many ways. Remember the old Clueless episode where Cher started a muff business? You can put pockets on them, cover them in faux fur, and add a rope to hang around your neck. I got a gorgeous one on Etsy a couple years ago that looks like real wolf fur. I’ll have to remember to pull that out tomorrow!

Clearly I have yet to put a dent in my winter shopping list.

My Love of the Swing Dress

I noticed that despite this being a blog mainly about style, it’s been a while since I actually wrote about CLOTHING. Maybe it’s because I’ve only just recently become somewhat adept at hair and makeup, and new things are exciting. So anyway, I decided to write about something I’ve felt quite strongly about for some time now, my love of the swing dress.
This is not a love I’ve had all my life. When I was a kid, no dress was big or poofy enough for my taste. If I dressed the way I wanted to in my fantasies, I would have needed to block off whole streets to get around. But then, I grew up. An appreciation grew in me for all things sexy, sleek, adult.


When I saw swing dresses, I thought they were horribly frou frou. They were too juvenile and too girly. I wondered how a girl could be taken seriously in them. However once I started to really explore my love of vintage style, I knew I couldn’t avoid them forever. I didn’t have to like them, but I did have to give them a chance.
And this is a perfect example of why stepping out of your comfort zone can be a great thing. I purchased two simple halter swing dresses  in blue from Trashy Diva on clearance for 35$ each, and they immediately revolutionized my wardrobe.


First of all, these particular dresses were about as simple as a plain white tshirt. They begged for some artistic expression. There’s something incredibly appealing about something you can make you own, but that already has the hard work done for you. On one of the dresses I spent days sewing a white ribbon trim an inch or so above the hem. This is now my “sailor dress”, inspired by a dress from Pinup Girl Clothing that I neither could afford nor ever saw available in my size. The second I dyed black, or at least I tried to, since it ended up coming out a dark navy. It’s just as well, because now I plan on sewing a black ribbon to the hem of that one and the two can be good and evil twins.


What I didn’t expect, but should have if I had thought about it any length of time, was how unbelievably comfortable they are. They’re hands down the least restricting thing you can wear below the waist. I feel like I have nothing on at all, and have been tempted many times to fall asleep in them. This is why I find it incredibly amusing when people are so stunned by just how “dressed up” I am to do every day normal activities. One pizza guy nearly lost his damn mind. I’d hate to see how his girlfriend dresses.


But above all else, I would have to say that the most appealing thing about the swing dress is how flattering it is on every body type. Like I’ve said about other vintage style clothes, they don’t hide your curves, they celebrate them. If you don’t have any to begin with, these dresses will create them. Either way, they’re incredibly easy to get in your size, since your hip measurement doesn’t factor in at all, perfect if you’re a different size on top than on the bottom. This is the most universally flattering and easy to wear clothing item I have ever encountered. My mom once had to poke me in the ribs to prove I wasn’t wearing a corset, while I had decided on that dress because I was planning on stuffing my face that day and knew no one would be the wiser. I scoff at people who say their hips are too big, or they’re just generally too fat. I PROMISE you, a swing dress will make you look amazing.


Then finally there’s something to be said about the fantasy factor. If you’ve ever had that familiar weirdo dream of prancing around in Victorian gear, the swing dress can give you the same feeling as being a proper civil war lady without actually looking anywhere near so odd. The way they move when you walk, the beautiful upside-down flower shape you see when you catch yourself in the mirror – all these things are the subtle little somethings that make swing dresses make me feel good. Even when I’m not in the mood for one on a particular day, if it’s all I have to wear and I put it on anyway, it still makes me feel pretty, still puts me in a better mood, so I wonder how I ever could have considered putting on anything else.
So now the formerly anti-frou-frou me is slowly building up a collection. I just got my first true vintage swing dress a couple weeks ago, a gorgeous copper number probably from the early 1960s.


Even if you have any doubts, try one, just once. Get it cheap, because it’s easy, or make one, because that’s easy too. You’ll see. I’ve seen this change of heart happen in others besides myself, and you’ll probably see it in yourself too.